PowerMTA (PMTA) Installation
PMTA (PowerMTA) can be installed both on a server running CentOS, Debian, and Windows operating systems. For reliability and stability, it is recommended to use CentOS. If the installation is done via the PlexMail script, then CentOS 8 is recommended, although the installer will work correctly under CentOS 7.
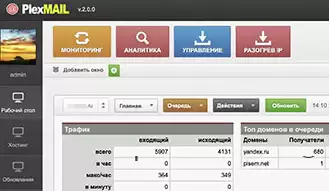
important: In this article, we consider the process of installing PMTA using a unique PlexMail script. All images published here are the PlexMail script and its PowerMTA installation algorithm.
Installing the PowerMTA package itself takes a few minutes. Yes, that's right – PMTA installation is quite simple and is performed with just a few commands. But PMTA will not work properly without preparing the server itself (its operating system), as well as without the initial configuration. If we consider the completely manual installation process of PowerMTA, it will take at least 2 hours (installation of operating system packages, system configuration, preparation of configuration data, as well as the formation of the configuration itself. Together with PlexMail, PMTA installation takes only 5-10 minutes. In addition, you have several automatic options for creating a PMTA configuration, depending on your goals, as well as infrastructure.
PMTA CONFIGURATION OPTIONS
The advantage of PMTA is also that this script is able to work with almost any server infrastructure, depending on your tasks. You can send on behalf of each domain and its separate dedicated IP, or you can send on behalf of just one domain with rotation (substitution) of dedicated IP servers. To implement this or that task, you need to prepare your own configuration, according to which the PMTA will work. Below are the PlexMail modules that allow you to install a full-fledged smtp server based on PowerMTA with different configurations and tasks.
PMTA Installation
PMTA DOM Configuration Model
Installing PowerMTA and creating a configuration for mailing on behalf of each domain and its individual IP. At the same time, DNSmanager is not required (domains work on local NS).
PMTA Installation
PMTA SUB Configuration Model
Installing PowerMTA and creating a configuration for mailing on behalf of a single domain with rotation of dedicated IP. At the same time, DNSmanager is not required (the domain runs on its local NS).
PowerMTA Installation
PMTA DNS Configuration Model
Installing PowerMTA and creating a configuration for mailing on behalf of each domain and its individual IP. At the same time, the domains work on third-party NS (an account in the hoster's DNSmanager is required).
POWERMTA INSTALLATION STEPS
In PlexMail, the PMTA installation process takes only 5-10 minutes and consists of four main steps: entering domain and IP data, specifying the archive for unpacking to the root of each domain (necessary if you plan to use tracking domains in your mailing script), as well as a list of future mailboxes that will be created during the installation of PowerMTA.
PMTA Installation - Step 1
STEP 1: Specifying the data to connect to the server, as well as the future password to the PMTA.
STEP 2: Specifying domains, IP to create vMTA during installation.
PMTA Installation - Step 3
STEP 3: Download the archive, which will be unpacked to the root of each domain.
PMTA Installation - Step 4
STEP 4: Specify the names of future mailboxes that will be created automatically during the installation process.
Go back